This tutorial will help you understand how to Add a Note to a contact so you can organize your follow-up structure.
You have previously and successfully learned how to Add and Edit Contact Categories as well as add contacts to a specific category. Now you are ready for the next step, which is How to Add a Note and all related functions for a specific contact.
Via Computer Web Browser
Now that you have finished adding contacts to your categories, it’s time to take action, make some notes, etc. using the systems contact manager. You can Accomplish the tasks by following these simple steps.
Create a new Note and Save it:
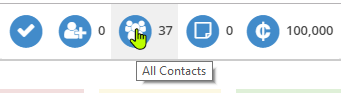
Step 1: On any page, click on the All Contacts icon (top right), to take you to the All Contacts page.
Step 2: Click on the contact you are searching for to open the Contact Manager page for that user.
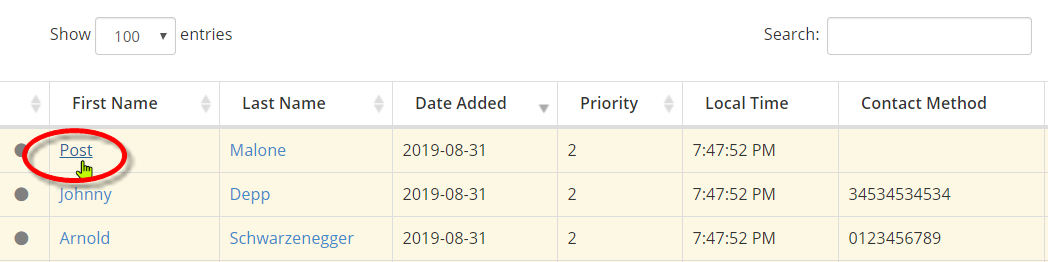
Note: Both the First and Last Name link will redirect to the same page, ie. the Contact Manager page.
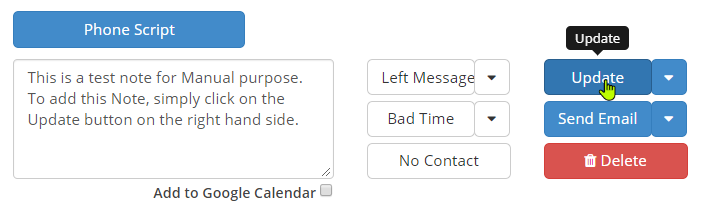
Step 3: Scroll down to find the Add Note text-box. Simply type in your content and click on Update.
Edit and Save an existing Note:
Step 1: Scroll to the Notes section and click on the Edit icon corresponding to the one you wish to modify.

Step 2: The note will appear in an editable format. Change the content and then hit Save to apply the changes.

Using the Buttons:
- This application provides a bunch of easy One-Click operations (with multiple choices) to make your task easier, hence saving you much time and effort. Best suitable for tasks on-the-go.
- Right next to the Adding a Note section (described above), you will see the Buttons which will assist you when attempting to make contact with your prospects or customers.
- Every action will be recorded as a Note which you may wish to edit later (see the above explanation).
- The details of all these buttons are described in the next section for further reference.

Buttons in Action
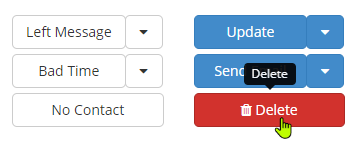
Now we will learn the purpose of the buttons and how they function. There are 6 buttons arranged into two columns. We have explained them separately along with their subsequent operations and performance.
Left Message: It will stamp a note stating that you have tried to call the person and left a message via voicemail, etc. The system will automatically remind you to follow up with your contact within the next 3 (three) days and will send a notification email to the customer/prospect. You will also have the option to choose a follow up date.

Bad Time: It will add a note stating that it was not an ideal time to speak to him and will send the customer / prospect an email notifying them of the same. You may be redirected to the Action List page depending on the action you have taken. You can choose other options as required by clicking on the arrow next to that button.
- Interested: Stamps a note stating that you have called the person and that he has shown interest in your business.
- Not Ready: Stamps a note stating that you have called the person and that he is not ready to follow your business ideas.
- Wrong Number: Stamps a note stating that you have dialed a wrong number, i.e. the number does not belong to the contact.
- No Answer: Stamps a note stating that you have called the person and he/she did not answer the call.

No Contact: Clicking on this button will automatically set the contact’s priority to 10 and set the next follow up date to Never. However, it will still leave him in any email series you have included him in for the purpose of dripping on.

Update: This button triggers the system and says that some modification has been made to the contact’s details and that the data needs to be saved. In this context, we have used the button to save a note for a contact.
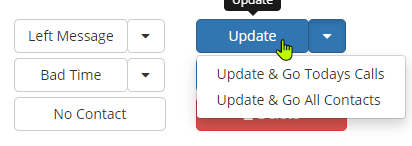
In addition to updating a note, you can opt to navigate to either the Action List or the All Contacts page after the action has taken place. Instead of clicking on Update , click on the down arrow next to it and choose your path.
Send Email: It will send a custom email to the prospect right away via our mail servers . A note will be added into the list regarding your action upon transmission of the email. Here’s what you need to do to send a custom email:
- Click on the button labeled as Custom Email to bring up a blank email template.
- A floating window will pop up where you can type in the content of the email as desired.
- Once done, click on the Send button below to send the email to the receiver.
Furthermore, you can navigate to the Action Subscription or Quick Send Emails, which are the edit sections of the existing subscription emails associated with this contact. You will be able to modify the content of the pre-set emails related to the other buttons in this context.

Delete: As the name suggests, this button is used to remove the contact from the system permanently. Make sure you really want to delete the contact by acknowledging the system’s verification message. Click Cancel to return.
Access through the Mobile App
All Small Business Dream Tutorials are shown with a Computer view as explained above. This is the easiest and most complete way to Configure your Small Business Dream system, but if you are wanting to configure some areas by using your Mobile App, here are the simple steps to help you get started quickly.
Step 1: On the home page when logging into the Mobile App, you will see Action List and Social Tasks.
Step 2: Click on the menu (3 horizontal lines) at the top left corner of the page to expand the list.
Step 3: Then you will see your Wallet, Store Details (where you can setup and view your store details), Contacts and Manage.
Step 4: Click on the menu item to view and configure that particular area of your system.
Until our Next Lesson on Configuring your Sales Funnel!
Happy Dreaming. Yours Truly,
SmallBizDream.com Support and Training Crew
PS: If you want to jump ahead and learn more, you can see the entire training series by clicking here: Tutorial.