This tutorial will help you understand how to setup Survey questions so you can get more information from your prospective clients that what exactly they are looking forward from your business and what are their tastes & interests.
In the previous email, we spent some time in the Presentation edit area of the Sales Funnel. Now we are going to focus on helping you setup your Survey Questions through the Survey page (third page of the Funnel).
You may wish to watch the video related to the Sales Funnel Setup by clicking on this link: Survey Engine Setup
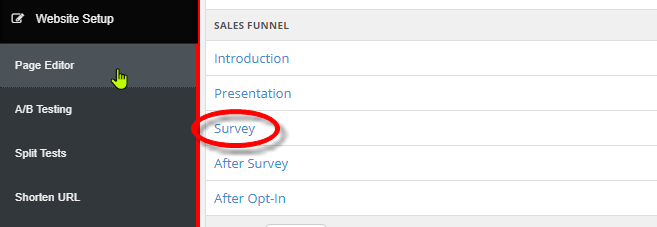
In order to go to the configuration section of your Sales Funnel, click on Website Setup > Page Editor. Then, in the Page Editor, click on the Survey link under the SALES FUNNEL section. If you are already inside the sales funnel area, select the Survey option from the drop-down menu in the Edit Page section at the top right.
Step 1: In the Survey Setup page, you can either select an existing Survey from the drop-down list or create a new one by clicking on the Add button. The system will auto-populate the fields based on the option chosen.

Step 2: Click on the Edit Survey Page Content to enter/design the content which would be displayed below the Survey. This is an optional feature, which means you may or may not prefer to add any content after the survey.

Clicking on this button will bring up the Content to Show AFTER Survey Page Content window where you can design your content in the editor through the similar process as you have designed the previous pages in the funnel.

Once done, click on the Save button below.
Step 3: Next comes the Contact Details To Collect section. Here you need to Enable/Disable the fields for the Data Collection (general/contact details) in the survey and set the Mandatory fields as per your requirements.
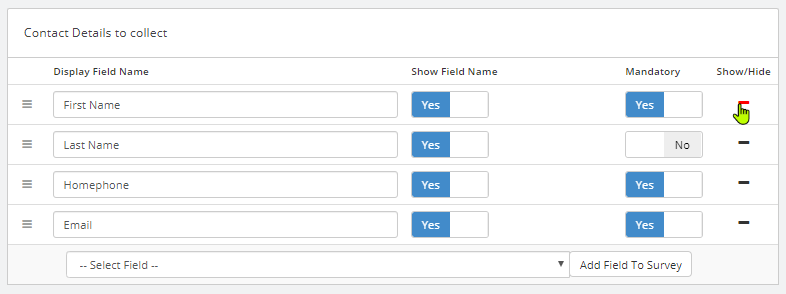
Note: If you do not find the field you are looking for, then click on the drop-down below to choose the field you want to add and click Add Field to Survey button beside it.

Step 4: Type in your Survey Questions and set their respective Answer Types from the drop-down list. For the Default or an existing survey, you may edit the Survey Question as well its corresponding Answer Type.

Step 5: Click on the Show Answers button to display the section where you can do all of the following;

-
- In order to make the question mandatory to be answered, check on the Answer Required box.

-
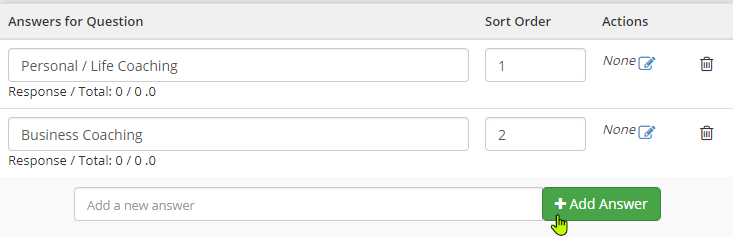
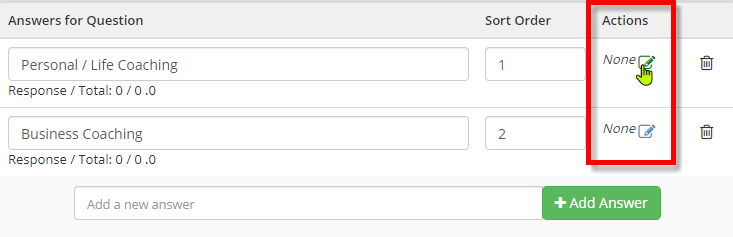
- Type in a suitable answer or option in the text-box below the Answers for Question column.
- Set the order of appearance in the Sort Order column. You may wish to edit the default value as desired.
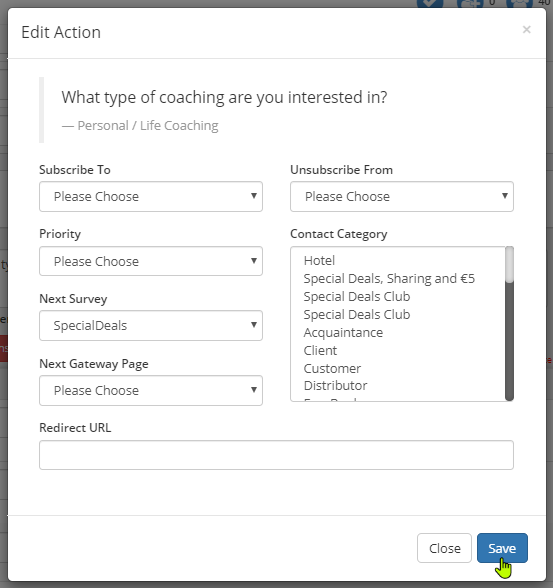
- Click on the Edit Action icon to open the panel to set the specific action to be triggered upon selecting the answer. Set the details of the action from the respective drop-down list and then click on the Save button.
- Subscribe To: The user would get subscribed to the selected series upon choosing an answer.
- Unsubscribe From: The user would get unsubscribed from the selected series upon choosing an answer.
- Priority: Set the priority of the action, if you have multiple actions set for this answer.
- Contact Category: Categorize the contact type based on the answer they select.
- Redirect URL: The user would be redirected to the URL that you enter here upon choosing an answer.
- Next Survey: The user would get redirected to the selected survey upon choosing an answer.
- Next Landing Page: The user would get redirected to the gateway page upon choosing an answer
If you wish to remove an answer from the list, click on the icon next to that under the Delete column. To add a new answer, click on the Add Answer button. This will include a blank row where you can enter the details.

Step 6: To add more questions to the survey, click on the Add Question button below and enter the details in the blank fields. In order to remove the entire question setup, click on the Delete All Questions button.

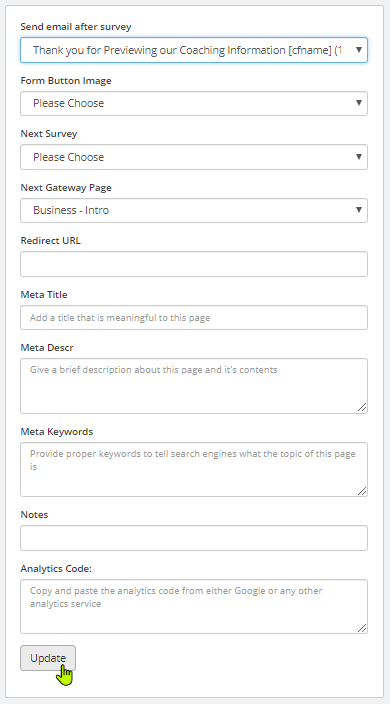
Step 7: You can choose to send a specific email after the survey is over and also choose to send another survey to be sent to the customer. You can also enter the basic Survey details, i.e. Notes, Meta Title, etc. and then click Update to save the changes.
Access through the Mobile App
All Small Business Dream Tutorials are shown with a Computer view as explained above. This is the easiest and most complete way to Configure your Small Business Dream system, but if you are wanting to configure some areas by using your Mobile App, here are the simple steps to help you get started quickly.
Step 1: On the home page when logging into the Mobile App, you will see Action List and Social Tasks.
Step 2: Click on the menu (3 horizontal lines) at the top left corner of the page to expand the list.
Step 3: Then you will see your Wallet, Store Details (where you can setup and view your store details), Contacts and Manage.
Step 4: Click on the menu item to view and configure that particular area of your system.
Until our Next Lesson on Setting Up your After Survey Page!
Happy Dreaming. Yours Truly,
SmallBizDream.com Support and Training Crew
PS: If you want to jump ahead and learn more, you can see the entire training series by clicking here: Tutorial.